Turning Your Garden Into A Water Wonderland

Are you dreaming of transforming your yard with a custom water feature but wondering how it will fit with your existing garden? Or are you unsure about where to place it, what style to choose, and how to keep it low-maintenance?
This guide walks you through every step, from assessing your current landscape to making custom water features blend seamlessly with what’s already there.
By the end, you’ll be more confident that your Morganton pond-building project can work in your yard.
Steps To Seamlessly Incorporate Custom Water Features Into Your Existing Landscape
- Assess the Current Landscape Layout: Identify the main features, style, and flow of your existing landscape
- Choose a Compatible Water Feature Type: Select a water feature that matches your garden’s current theme and scale
- Select an Ideal Location Within Existing Elements: Position the water feature where it complements existing trees, plants, and structures
- Design for Visual and Textural Integration: Plan materials, surrounding plants, and features to blend the new element seamlessly
- Consider Maintenance and Access: Choose an option that’s accessible without disrupting established plantings
- Install with Minimal Disturbance to Established Features: Carefully follow installation steps to maintain the integrity of your current garden
- Enhance with Additional Elements: Add subtle touches like lighting and plants that integrate the water feature naturally into the landscape
- Final Adjustments For Harmonious Integration: Tweak your design so that it fits your vision
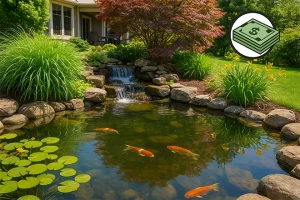
How much does a pondless waterfall cost?
Step 1 – Assess The Current Landscape Layout
Map Out Key Features And Focal Points
Before introducing any custom water features, start by mapping out your existing landscape.
Identify the main focal points—trees, pathways, statues, or garden beds—that define your space.
Noting these areas helps you understand where a new water feature, such as a reflection pool or custom fountain, might add visual interest without overwhelming existing elements.
Identify Landscape Flow And Pathways
Consider the natural flow of your garden.
Are there pathways that guests frequently use? Where do people tend to start and end when walking in your garden?
Strategically placing a custom-designed water feature along these paths can draw attention while adding depth to the space. Water walls or bubble walls work especially well near high-traffic areas like pathways.
Understand Drainage And Water Flow Patterns
Identify any slopes or low areas that naturally guide water flow.
This insight is crucial for choosing the right water feature type, especially if you’re considering a pond or stream.
Use these areas to install waterfall designs or reflection pools, which will enhance the landscape with minimal grading.
Assess Sunlight And Shade Distribution
Observe how light moves across your garden throughout the day.
A sunny spot might be ideal for a fountain surrounded by aquatic plants. Shady areas can benefit from wall fountains or water walls to prevent algae buildup.
Your garden’s light and shade patterns can significantly impact the success of your chosen feature.
Step 2 – Choose A Compatible Water Feature Type
Choosing A Feature By Garden Style
Your garden’s style helps determine the best water feature.
For a traditional garden, a custom fountain with tiered levels creates a classic look.
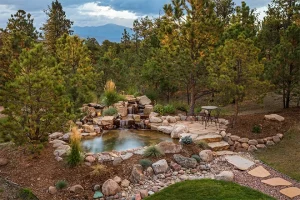
If you have a naturalistic or rustic setup, a custom water feature like a rock-lined waterfall adds a gentle, organic element.
For modern landscapes, rain curtains or sleek water walls introduce a contemporary flair.
Scale And Size Compatibility
Balance the scale of your water feature with your garden’s layout.
A large landscape can accommodate sprawling custom water features or a reflection pool that adds a visually stunning impact.
In smaller gardens, container ponds or compact wall fountains can enhance the space without taking over.
Selecting Space-Saving Options
Limited space?
Wall-mounted features such as water walls or rain curtains add vertical interest and help conserve ground space. Pondless waterfalls don’t take up much room either, and they add the relaxing burble of running water.
These are ideal for tighter landscapes or residential courtyards where a standalone fountain might feel too imposing.
Check out these pondless water feature designs.
Determine Wildlife Attraction Needs
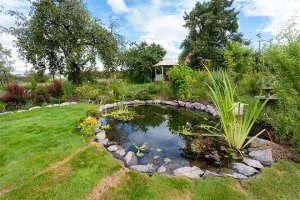
If you’d like to attract birds, butterflies, or other wildlife, consider water features like bird-friendly fountains or ponds with shallow edges.
Adding these types of custom water features enhances your garden’s biodiversity and creates a lively, engaging environment.
Step 3 – Select An Ideal Location Within Existing Elements
Harmonizing With Existing Trees, Shrubs, And Flower Beds
To avoid disturbing the landscape, position your custom water feature in open spaces near existing flower beds or ground cover. Put them close to flower beds to allow moisture-loving plants to thrive nearby.
Positioning For Visual Impact From Different Viewpoints
Place your custom water feature in a spot that can be admired from multiple angles. Ensure the water feature is visible from seating areas, indoor windows, or entry points.
More about proper pond placement.
Using Natural Barriers And Fencing
Leverage natural elements like hedges, fences, or walls as backdrops for fountains or water walls. This setup helps the feature blend effortlessly with your garden while still standing out as an attractive focal point.
Balancing Sun And Shade Requirements
Be mindful of sunlight needs, especially if you’re using aquatic plants. While a fountain can be placed in shaded spots to prevent algae growth, a reflection pool or waterfall design may need sunlight to help plants thrive and keep the water warmer when temperatures cool.
Step 4 – Design For Visual And Textural Integration
Consistency Creates Seamless Blending
Choosing materials that echo existing hardscaping elements like stone, tile, or metal will unify your water feature with the rest of the garden. For example, using glass or stone in a water wall to reflect similar textures in pathways can ensure a cohesive look.
Consistent use of color and texture across both the landscape and the water feature materials prevents visual dissonance. Integrating materials like glass in a water wall or natural stones in a waterfall design can help the feature blend with the surrounding space.
Use similar rocks or gravel around the base of your water feature to merge it seamlessly with garden paths or borders. For a rustic feel, mulching around the edges of ponds or fountains can complete a naturalistic look.
Here’s how to design a backyard pond.
Layered Planting For Natural Transitions
Frame your custom water feature with layered planting.
Tall plants and shrubs provide a natural backdrop. The lower ground cover plants lead the eye toward the water.
This technique is especially effective around ponds and fountains as they create a gradual transition from garden to water feature.
Step 5 – Consider Accessibility
- Ensure pumps, filters, and lights are easy to reach without disturbing plants
- Position water features to avoid affecting root systems or soil health
- Avoid placing ponds, streams, or custom fountains where excess moisture could harm sensitive plants
Step 6 – Install With Minimal Disturbance To Established Features
Use tarps or barriers to shield plants from dust and debris during installation. When possible, avoid using heavy machinery that may compact soil or harm plant roots.
Be cautious with excavation. If digging is required, work around major tree roots and underground systems to maintain plant health. Smaller tools are best for sensitive areas, especially around established shrubs and trees.
If the installation is extensive, temporarily relocate delicate plants. Replanting them afterward can help retain the garden’s original look while making room for the new water feature.
After installing the water feature, gradually reintroduce mulch, soil, and rocks. This creates a natural transition from the feature to the rest of the garden without stark lines or noticeable construction residue.
Step 7 – Enhance With Additional Elements For Cohesion
Integrate Subtle Lighting For Evening Ambiance
Install submersible or landscape lighting that complements existing garden lights. Highlight surrounding paths and plants for added ambiance and a more visually stunning nighttime effect.
Surrounding Plant Choices To Match Existing Greenery
Select plants with similar colors, heights, and textures to create a seamless flow from the existing garden into the area surrounding your custom-designed water features.
Decorative Accents And Ornaments
Incorporate subtle garden statues, bird feeders, or small ornaments that tie in with your garden’s theme. These elements add personality and create a balanced, well-rounded visual around the water feature.
Step 8 – Final Adjustments For Harmonious Integration
Once the water feature is in place, adjust surrounding elements like plants, lighting, and pathways as needed. This final touch ensures the feature blends perfectly with the existing landscape, making it a cohesive part of your outdoor environment.
Be sure to avoid these pond-building mistakes.
A Pond That Looks Like Your House Was Built Around It
Whether you’re envisioning a tranquil pond or an elegant water wall, Morganton Ponds & Hardscapes is here to bring your custom water feature ideas to life. Our expert team can handle every detail, ensuring your water feature integrates seamlessly into your existing landscape.
Ready to enhance your outdoor space? Fill out our contact form today or give us a call, and let’s create a custom water feature that transforms your Morganton, NC, property.