Lay It Down Right
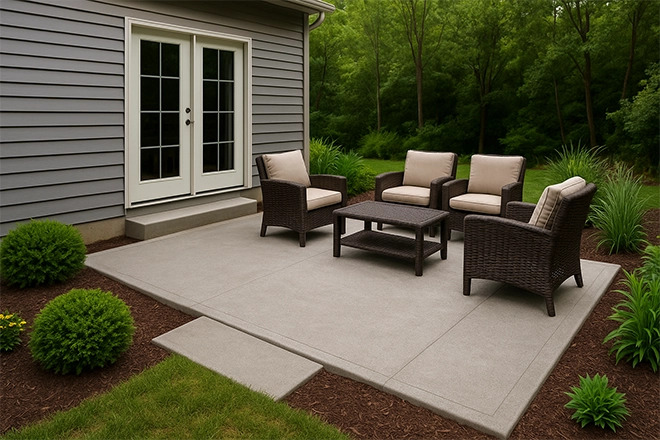
Thinking about adding a concrete patio but not sure where to start? Wondering if it’s really a project you can handle without hiring a crew? In this post, you’ll learn how to install a concrete patio in your backyard.
By the end, you’ll know how to prep, pour, and finish your concrete patio like a pro and feel confident you’re building something that lasts (or you’ll know if you want to hire a pro instead).
Key Points
- Concrete patios are built in 10 key steps, from planning and excavation to pouring and curing.
- The process requires basic tools and a strong game plan.
- A proper base, good formwork, and careful finishing are what make the difference between cracks and quality.
Concrete Patio Installation in 10 Steps
- Plan and mark your patio layout
- Excavate the area
- Build the forms
- Add and compact the gravel base
- Place reinforcement
- Mix and pour the concrete
- Screed and bull float the surface
- Edge and cut control joints
- Apply surface texture
- Let it cure
Tools and Materials You’ll Need
Essential Tools
- Shovel
- Hand tamper or plate compactor
- Screed board (straight 2×4)
- Line level
- Bull float
- Magnesium float
- Edging tool
- Control joint groover or circular saw
- Broom
- Wheelbarrow
- Stakes
- Hammer or drill
Required Materials
- Concrete mix or truck-delivered concrete
- Gravel or crushed stone
- 2×4 or 2×6 form boards
- Wood or metal stakes
- Wire mesh or rebar (optional reinforcement)
- Expansion joint strips
- Cure and seal compound
- Plastic sheeting (for covering during cure)
- Commercial release agent or vegetable oil for forms
1. Plan and Mark Your Patio Layout
Start by choosing your patio size and shape, keeping in mind how it will fit with your house and yard.
Use stakes and a mason’s line to outline the area, and make sure it slopes slightly away from the house to prevent drainage issues. A slope of 1/8 to 1/4 inch per foot is recommended.
If you’re using batter boards, you can run string lines tightly across corners to help keep everything square and level. This is especially helpful if you’re working on a large slab or an irregular shape.
2. Excavate the Area
Dig out the marked area to a depth of at least 8 inches to make room for both the gravel base and the concrete slab.
The standard breakdown is 4 inches of gravel and 4 inches of concrete, though this may vary if you’re planning a heavier load or for thicker slabs.
Remove all grass, roots, soft soil, or any organic matter that could decay over time.
Use a shovel and a level to keep the depth consistent across the entire patio. You want your excavation to end up flat and firm.
3. Build the Forms
Construct your frame using 2×4 or 2×6 boards, depending on the desired finished height of the patio.
Set the boards in place around your excavation and drive in stakes every 2 feet, keeping the stakes flush with the top of the forms so they don’t interfere when you screed the slab.
For long stretches, join form boards with a plywood backer to keep them from flexing.
If your patio touches your house or another concrete pad, install expansion joint strips to allow for movement and help prevent cracking.
4. Add and Compact the Gravel Base
Pour in a layer of gravel or crushed stone, aiming for a minimum of 4 inches thick.
If your soil doesn’t drain well or you’re in a freeze-thaw climate, bump that up to 6 inches.
Use a hand tamper or plate compactor to compact the gravel in 2-inch layers, checking with a level as you go. This is what keeps your concrete from settling or cracking later on.
5. Place Reinforcement
Lay wire mesh or rebar across the compacted base to help strengthen the concrete slab and prevent cracking over time. If using mesh, raise it slightly on supports so it sits in the middle of the slab, not at the bottom.
Reinforcement is especially useful for larger slabs or high-traffic areas. It adds a lot of durability for minimal cost and effort.
6. Mix and Pour the Concrete
Use a wheelbarrow and shovel to mix bagged concrete or arrange for a ready-mix truck if you’re working with a larger area.
Start pouring from one corner of the form and work your way across the patio.
Distribute the wet concrete evenly with a shovel or garden rake.
Keep the pour continuous when possible to avoid cold joints or uneven drying.
7. Screed and Bull Float the Surface
As you fill the forms, run a screed board across the top to level the concrete to the finished height.
Use a side-to-side sawing motion and pull it toward you to create a flat surface.
Immediately follow with a bull float to push the small particles down and bring the cement paste and water sheen to the top. This helps the surface smooth out before it sets.
8. Edge and Cut Control Joints
Use an edging tool to shape the slab’s corners and give your patio clean, rounded edges that resist chipping.
Then, cut control joints into the concrete using a groover or a circular saw once the slab has firmed up slightly.
Control joints should be spaced every 4 feet or so and cut to a depth of at least one-quarter of the slab’s thickness. These joints help manage cracking by giving the concrete a planned place to crack as it shrinks and shifts.
9. Apply Surface Texture
For most patios, a broom finish is the go-to option. It creates texture on the surface for slip resistance and gives your patio a clean, professional look.
Just drag a concrete broom across the surface after the water sheen fades, but before the concrete fully sets.
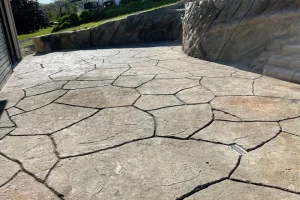
If you want a decorative finish, you can press in stamps or textures using special tools, but you’ll need to work quickly and apply a commercial release agent to prevent sticking.
10. Let It Cure
Cover the entire patio with plastic sheeting or spray it with a cure and seal compound to begin the curing process.
Curing is critical. It strengthens the slab and helps prevent cracking from drying too quickly.
Keep the surface damp or sealed for at least 48 hours. Avoid placing furniture or walking on the slab for 7 days, and wait a full 28 days before putting any heavy weight on it.
Use these concrete patio ideas to really bring it to life!
FAQs About Concrete Patios
What does a concrete patio cost?
The cost of a concrete patio starts at $15 per square foot. A basic 10×10 patio costs $600 to $1,800, while decorative or larger patios can exceed $4,000. Labor is a major cost factor, and DIY options reduce expenses. Decorative finishes increase price but add curb appeal and value.
How thick should a concrete patio be?
A concrete patio should be at least 4 inches thick for regular use. Increase thickness to 5 or 6 inches for heavy loads like hot tubs or ovens. Thicker slabs offer more strength and reduce the risk of cracks or settling over time.
What kind of base does a concrete patio need?
A concrete patio needs a base of at least 4 inches of compacted gravel. Use 6 inches in cold climates or poorly draining soil. Compact in layers and ensure the base is level to support the slab and allow proper drainage.
Discover more about hardscaping for your backyard.
Pouring Perfection: Morganton Ponds & Hardscapes Does Patios Right
A well-built concrete patio doesn’t just improve your yard—it gives you a low-maintenance, long-lasting space to relax, entertain, and enjoy life outdoors. Morganton Ponds & Hardscapes brings the tools, materials, and skill to make your vision real, right here in western North Carolina.
If you’re ready to take the next step, fill out our contact form today or give us a call. We’ll help you get the job done right from the ground up.