Building Stone by Stone
Ever wonder how to hold back a slope without calling in the big machines? Want to make your yard more functional and better looking at the same time?
In this post, you’ll learn how to build a retaining wall, from picking the right blocks to setting the last cap.
By the end, you’ll know if you want to DIY or hire a pro retaining wall installer to create a strong, good-looking wall that’s built to last.
Overview of How to Build a Basic Retaining Wall
- Planning Your Retaining Wall
- Gathering Tools and Materials
- Choosing the Right Wall Blocks
- Marking and Measuring the Layout
- Excavating and Leveling the Trench
- Setting the First Course
- Backfilling and Installing Drainage
- Stacking Additional Courses
- Capping and Final Touches
Contact us today about your retaining wall installation.
1. Planning Your Retaining Wall
Before you build a retaining wall, you need a solid plan.
Start by choosing the right wall blocks for your project. Interlocking blocks with a locking flange are great for DIY builds under four feet tall.
If you’re tackling steep slopes or a taller wall, you may need a more advanced system—or even professional help.
Mark out your wall’s placement with rope or hose.
Measure the total length and desired height. That will help you determine how many blocks you need.
Check your local building codes before you start digging—permits may be required.
And don’t forget to call 811 to mark underground utilities.
Think about the soil you’re working with, too. Clay holds water and increases soil pressure. Sand drains faster but may need reinforcement.
If you’re creating a raised garden bed, use well-draining backfill materials to keep roots healthy and the structure stable.
Want some retaining wall ideas?
2. Gathering Tools and Materials
For tools, you’ll need a shovel, hand tamper, rubber mallet, line level, and a circular saw with a masonry blade. Safety gear—like gloves and glasses—is non-negotiable.
Your material list should include:
- Wall blocks (gravity, interlocking, or concrete blocks)
- Paver base or crushed rock for the wall base
- Landscape fabric
- Crushed stone or gravel for backfill
- Perforated pipe for drainage
- Construction adhesive
- Cap blocks (optional)
Make sure you buy 10% more blocks than you think you need. That covers breakage and makes it easier to fix damage later without mismatched bricks.
3. Choosing the Right Wall Blocks
There are different kinds of blocks used in retaining walls, and the choice matters.
Concrete blocks are sturdy and stack well.
Interlocking wall blocks with a locking flange make it easier to build a retaining wall that holds up to soil pressure without extra reinforcement.
If you want a more rustic look, you can also use railroad ties, though they may need extra anchoring and can break down over time.
For most garden walls, modular blocks are easier to work with and provide a cleaner finish.
Check the manufacturer’s specs to make sure the block type supports your wall’s height and purpose. Some blocks are rated for decorative use only, while others are made for holding back serious dirt.
4. Marking and Measuring the Layout
Use stakes and string or a hose to mark where your wall will go.
Follow the curve of the land or create clean straight lines—either way, you’ll want to visualize the full footprint before you start digging. Use a line level to keep everything consistent.
Plan to start at the lowest elevation of your slope and build upward from there. This helps keep your rows even and reduces the chance of having to reset the wall partway through.
If your wall is running alongside a house, patio, or sidewalk, double-check alignment. You want it to complement the rest of your yard layout, not fight against it.
5. Excavating and Leveling the Trench
Dig a small trench where the wall will sit.
The trench should be deep enough to bury the first course at least halfway—or a full block if you’re building a taller structure. This creates a stable footing and helps resist soil movement.
Compact the ground with a hand tamper before adding any base material.
Pour in crushed stone or paver base to about 4 to 6 inches, then level it. This wall base layer gives the wall a solid, drainable surface to sit on.
Make sure the top surface of the base is perfectly level from side to side and front to back. Don’t rush here—it sets the tone for the rest of the build.
6. Setting the First Course
This row matters most.
Lay each first block carefully and check that it’s perfectly level in all directions. Use a mallet to gently tap blocks into place. If one block is too high, remove and adjust the crushed rock underneath rather than trying to force it.
This first course becomes the foundation for everything above it. If it’s off, your wall will lean, shift, or buckle. Spend extra time here to avoid major issues later.
Depending on your wall design, you may need to cut some blocks at corners or transitions. Use your masonry blade for a clean cut, and always wear protective gear when cutting.
7. Backfilling and Installing Drainage
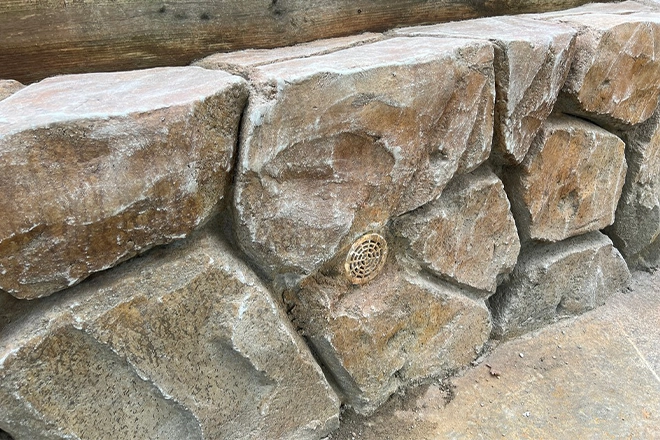
After your first course is in, start to backfill behind it using crushed stone. This reduces soil pressure and helps water drain away from the wall.
If you’re building near a house or working with heavy clay soil, add a perforated pipe at the base and wrap it with landscape fabric to prevent clogging.
As you build upward, continue backfilling with gravel or other well-draining backfill materials.
Add and tamp the fill every few rows to compact it evenly and maintain stability.
Using landscape fabric between the backfill and native soil helps keep dirt from seeping into your drainage layer. It also protects your structure over time.
8. Stacking Additional Courses
Stack blocks in a staggered pattern, offsetting seams like you would with bricks. This improves the wall’s strength and helps distribute soil pressure evenly.
Each time you add a course, double-check the level and alignment.
Some systems use pins or lips to keep the rows aligned. Others rely on adhesive. If you’re using adhesive, apply it to clean, dry surfaces and press the next row firmly into place.
As you go, continue to backfill behind each new course to avoid gaps or slumping. Keep an eye on spacing and surface contact so the structure stays solid.
9. Capping and Final Touches
Once you reach your desired height, it’s time to finish the wall.
Use capstones to cover the top surface for a cleaner, polished look. Secure each cap with construction adhesive.
Backfill the remaining dirt behind the wall and grade it slightly away to encourage proper drainage.
Add plants, mulch, or decorative stone if you’re working in a garden bed or landscaped area.
Take a final look at your wall from different angles. Make sure everything is aligned, tight, and well-finished.
You’ve just learned how to build a retaining wall.
Retaining Wall Design Considerations
Aesthetic Options
Retaining walls don’t have to look boring.
Decorative wall blocks with a textured or colored face can blend better with your yard or garden. You can also use concrete blocks with a veneer to match the exterior of your house or patio.
Want a softer look? Consider curved layouts, tiered levels, or even built-in planters that double as seating or garden beds.
If you’re working with slopes or tight spaces, designing around natural curves can make the wall feel intentional, not like an afterthought.
Just remember that curved walls may require smaller blocks and tighter placement to maintain strength.
Soil and Drainage Issues
Soil conditions should shape your design choices.
Heavy clay soil holds moisture, increasing soil pressure behind the wall, so a strong drainage plan is essential.
Sandy or well-draining soil types still need backfill materials like crushed stone, but they’re less prone to pressure buildup.
Plan your wall construction during a dry spell, especially if you’re digging into a hillside. Wet dirt is harder to compact and may shift during installation, making your footing and base material less stable.
Common Mistakes to Avoid
Poor Base Preparation
The biggest mistake people make when they build a retaining wall?
Rushing the base.
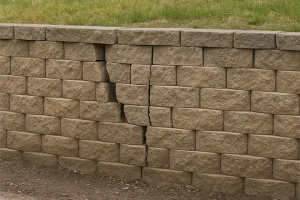
If your wall base isn’t level or compacted, the wall can lean, crack, or fall apart over time. The first course must sit on firm, flat footing—so take your time tamping and leveling the trench before stacking the first block.
Even a slight tilt in the first row can throw off the rest of the structure.
Ignoring Drainage
Water is the silent killer of retaining walls. This is why retaining wall drainage is important.
If there’s no way for it to drain out, it builds pressure behind the wall until something gives. Always include crushed rock or gravel behind each row. If you’re working on a taller wall or poor-draining soil, install a perforated pipe along the base.
Landscape fabric helps protect your drain by keeping out dirt and debris, preserving the flow.
Not Checking Codes
Don’t assume you can start digging anywhere.
Many areas require permits for retaining walls over a certain height, especially if they’re close to a property line, house, or street. Check your local building codes before you lift a shovel.
Skipping this step could mean fines or being forced to tear down your wall after it’s finished.
Standing the Test of Time (and Soil): Retaining Walls by Morganton Ponds & Hardscapes
When Western North Carolina landscapes need structure, Morganton Ponds & Hardscapes knows how to build a retaining wall that holds strong and looks sharp. From steep slopes to decorative garden beds, we create walls that protect your property and elevate your outdoor space.
Ready to build something that lasts? Fill out our contact form today or give us a call.